

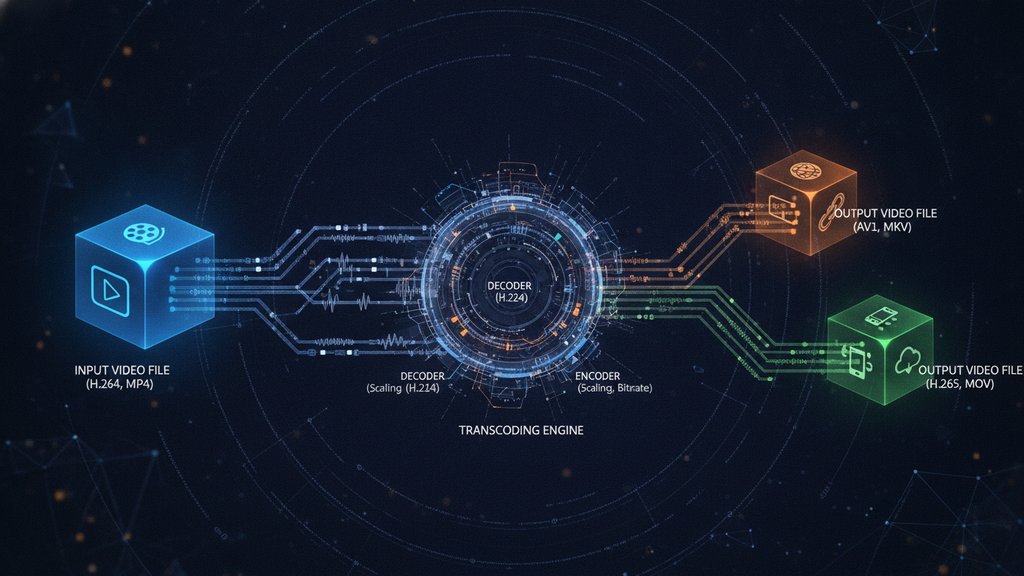
Video transcoding is the process of taking a video file and converting it from one format, codec, resolution, or bitrate into another. In plain terms, your software decodes the original video, then re-encodes it into a new version that's easier to store, stream, or play on a specific device. It's how a huge 4K clip from your camera becomes a smooth-streaming file on YouTube, or how a MOV from your phone turns into an MP4 your smart TV can actually open.
Content Table
What video transcoding actually means
Every video file has two layers: the codec (the compression method used for the actual video and audio data) and the container (the wrapper that holds everything together, like MP4, MOV, MKV, or WebM). Transcoding changes what's inside, not just the label on the box.
When you transcode, you're doing at least one of these:
- Changing the codec (for example, H.264 to H.265 or AV1)
- Lowering the resolution (4K down to 1080p or 720p)
- Reducing the bitrate (fewer bits per second, smaller file)
- Switching the container (MKV to MP4)
Because the video data gets decoded and then re-encoded, transcoding is basically a controlled form of re-encoding video. That re-encoding step is where quality can drop if you set the bitrate too low, so it pays to understand what each setting does before you hit go.
How video transcoding works step by step
Under the hood, a transcoder like FFmpeg follows a predictable path:
- Demux the file, separating the video stream, audio stream, and any subtitles from the container.
- Decode the compressed video back into raw, uncompressed frames the software can work with.
- Process those frames if needed, such as scaling to a new resolution, changing the frame rate, or tone-mapping HDR down to SDR.
- Encode the raw frames again using the target codec and bitrate settings.
- Mux the new video and audio streams back into the chosen container.
That decode-then-encode cycle is the key difference from a simple file rename. Since the frames are rebuilt from scratch, the new codec's settings fully control the final size and quality. The bitrate you choose during encoding is the single biggest factor in how the output looks.
Transmuxing vs transcoding
People often mix these up, but they're very different in cost and speed. The transmuxing vs transcoding distinction comes down to one question: does the actual video data get re-encoded?
| Aspect | Transmuxing | Transcoding |
|---|---|---|
| What changes | Container only | Codec, resolution, or bitrate |
| Re-encodes video? | No | Yes |
| Quality loss | None | Possible |
| Speed | Very fast (seconds) | Slow (CPU-heavy) |
Transmuxing just repackages the same streams into a new container, like moving furniture into a different truck. Transcoding rebuilds the furniture itself. If an MKV and MP4 both hold H.264 video, converting between them can be a fast transmux with zero quality loss. But if you need a different codec, you have no choice but to transcode.
Why transcoding matters
Transcoding is the invisible workhorse behind almost every video you watch online:
- Streaming platforms like YouTube and Netflix transcode every upload into multiple resolutions and bitrates so playback adapts to your connection. This adaptive bitrate approach is what transcoding streaming is all about.
- Device compatibility matters because an older TV might not decode AV1 or H.265, so files get transcoded to H.264 for guaranteed playback.
- File size and upload limits force transcoding when a raw clip is too big to share. Compressing it into a smaller codec or resolution solves that instantly.
That last point is where most everyday people run into transcoding. If a video won't upload because it's too big, transcoding to a lower bitrate is the fix. Our guide to video compression basics walks through the trade-offs, and the complete cheat sheet of platform file size limits shows exactly what target you need to hit.
How to transcode a video yourself
You don't need to be an engineer to transcode. If you're comfortable with a command line, FFmpeg is the industry standard. A basic H.264 transcode looks like this:
ffmpeg -i input.mov -c:v libx264 -crf 23 -c:a aac output.mp4
Here
-crf 23
sets the quality (lower means better and bigger), and the codec and container change from the original MOV to an MP4. Learn more about the tool from the
official FFmpeg documentation.
If the command line isn't your thing, an online tool does the same job in a few clicks: upload your video, pick a codec (H.264, H.265, VP9, or AV1), set a quality level, choose an output resolution, and download the smaller result. No installs, no syntax to memorize.
How long transcoding takes
The honest answer to how long does transcoding take is: it depends. Several factors drive the time:
- Video length and resolution — a 10-minute 4K clip takes far longer than a 1-minute 720p one.
- Target codec — AV1 and H.265 are much slower to encode than H.264 because they compress harder.
- Hardware — CPU-only encoding is slower than GPU-accelerated encoding, though CPU often gives better quality per bit.
- Quality settings — slower presets analyze frames more thoroughly and take longer.
As a rough guide, a short 1080p clip in H.264 might transcode in seconds to a minute on modern hardware. The same clip re-encoded to AV1 could take several times longer. Most tools show a progress bar with an estimated time remaining so you're not left guessing.

Transcode and shrink any video in your browser
Skip the command line. Upload your clip, pick a codec like H.264, H.265, VP9, or AV1, set a quality target and resolution, and let video transcoding do the heavy lifting to hit any upload limit.
Compress a video free →
It can, because the video is decoded and re-encoded from scratch. Each re-encode with a lower bitrate loses some detail. If you keep the bitrate high or use an efficient codec like H.265 or AV1, the quality drop is usually hard to notice at normal viewing distances.
They overlap heavily. Converting often just means changing the file format or container, while transcoding specifically involves re-encoding the video data into a new codec, resolution, or bitrate. In practice, most format conversions that change the codec are actually transcoding under the hood.
They create multiple versions at different resolutions and bitrates so playback can adapt to each viewer's connection speed and device. This adaptive bitrate streaming prevents buffering on slow networks while still delivering high quality to fast ones, all from a single upload.
Truly lossless transcoding is possible but rare, and it produces large files. If you only need a new container and the codec stays the same, transmuxing avoids re-encoding entirely and keeps quality perfect. For a codec change, expect at least a small, usually invisible, quality loss.
AV1 gives the smallest files at equal quality, followed by H.265, then VP9, with H.264 being the largest but most compatible. Choose AV1 or H.265 for storage and modern devices, but stick with H.264 if you need guaranteed playback on older TVs and browsers.